How to Create an Account
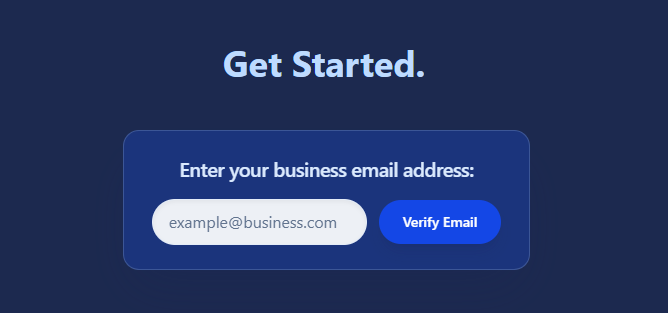
A CrumbsOS account is created by verifying a business email address and completing four setup steps:
- Create a password
- Name the business
- Add the owner’s name
- Create a four-digit Admin PIN
Stripe setup is not required during this account-creation process.
Open Account Creation
Start from either location:
- Go to crumbsos.com and select Create Account.
- From the CrumbsOS authentication page, select Create Account.
The signup page opens at crumbsos.com/signup.
Enter the Business Email
- Find Enter your business email address.
- Enter the email address that will own the CrumbsOS account.
- Select Verify Email.
The button displays Sending… while the request is processed.
When the email has been sent, the page displays:
- Check your email.
- A message explaining that a secure link was sent to verify the email and continue account setup
Find the Verification Email
- Open the inbox for the email address entered during signup.
- Find the CrumbsOS email with the subject You’ve been invited.
- If it is not in the inbox, check:
- Spam
- Junk
- Promotions
- Other filtered mail folders
- Open the message.
- Select Accept invitation.
The invitation states that the recipient has been invited to create an account.
If more than one invitation exists, use the newest message. Older invitation links may belong to a previous signup request.
The secure link opens the CrumbsOS Finish Signup page.
Step 1: Create Your Password
The first setup page displays:
- Step 1 of 4
- Create your password
- Password
- Confirm Password
- Show or hide password
- Next
- Enter the password.
- Enter the same password in Confirm Password.
- Select Next.
Password requirements
The password must contain:
- At least six characters
- A lowercase letter
- An uppercase letter
- A number
- A symbol
The password and confirmation must match.
This password is used with the account email when signing in through the main CrumbsOS authentication page.
Step 2: Name Your Business
The second setup page displays:
- Step 2 of 4
- Name your business
- Business Name
- Back
- Next
- Enter the business name.
- Select Next.
The business name is shown inside the CrumbsOS account and on the local PIN login screen.
Select Back to return to the password step without completing signup.
Step 3: Add Your Name
The third setup page displays:
- Step 3 of 4
- Add your name
- Your Name
- Back
- Next
- Enter the name of the business owner or primary account user.
- Select Next.
This name creates the owner profile for the business.
Select Back to review or change the business name.
Step 4: Create Your PIN
The final setup page displays:
- Step 4 of 4
- Create your PIN
- Four-digit PIN
- Show or hide PIN
- Back
- Finish Signup
- Enter a four-digit PIN.
- Confirm that the PIN contains exactly four numbers.
- Select Finish Signup.
The button displays Finishing… while CrumbsOS creates:
- The business account
- The owner profile
- The local Admin user
- The Admin PIN credentials
Do not close the page while setup is finishing.
Sign In with the Admin PIN
After setup is complete, CrumbsOS redirects to the local user-selection screen.
The new business name appears at the top of the page.
- Select Admin.
- Enter the four-digit PIN created during signup.
- Select Login.
CrumbsOS opens the new business’s POS screen.
The new account includes a default General category and Test Product so the POS can be used immediately.
Email and PIN Credentials
Account email and password
Use these credentials on the main authentication page to enter the business account.
Local Admin PIN
Use the four-digit PIN on the business’s user-selection screen to enter the POS as Admin.
Keep both credentials secure. The account password and local PIN serve different purposes.
Example Setup
A sample business could be configured as follows:
- Business email:
example@example.com - Business name:
Example Business - Owner name:
Example Owner - Admin PIN: a private four-digit number
Use a unique password that satisfies all displayed password requirements. Avoid using the example email or an easily guessed PIN for a real business.
Look for the Welcome Email
After account setup is complete, CrumbsOS sends a welcome email confirming that the account is active.
The email will look similar to this:
Good news, Example Business. Your CrumbsOS account is now active!
You can log in and start getting paid from your business dashboard at:
Need help or want to talk about features? Reply to this email anytime.
Thanks for checking us out,
– The CrumbsOS Team
If the welcome email does not appear in the inbox, check Spam, Junk, Promotions, and other filtered folders. Keep the email for its direct link to the CrumbsOS authentication page.